Fix a blurry or dark photo with AI prompts
Published
Short answerName the specific problem (motion blur, low light, low resolution) rather than just asking the AI to "enhance" the photo, and tell it to keep every face and object exactly the same. A vague request invites it to invent detail that wasn't there.
Full collectionAI photo enhancer prompts19 prompts with examples, steps and fixes →A photo can go wrong in several ways: it's blurry because something moved, it's dark and grainy because the light was poor, or it's just too small and soft when you blow it up. "Enhance this photo" asks the AI to guess which problem you have and fix it however it likes, which is how you end up with plastic-looking skin or a face that's subtly not quite right.
Naming the actual problem gets a much more reliable result. This guide covers the three most common ones: blur, darkness, and low resolution.
Fixing motion blur
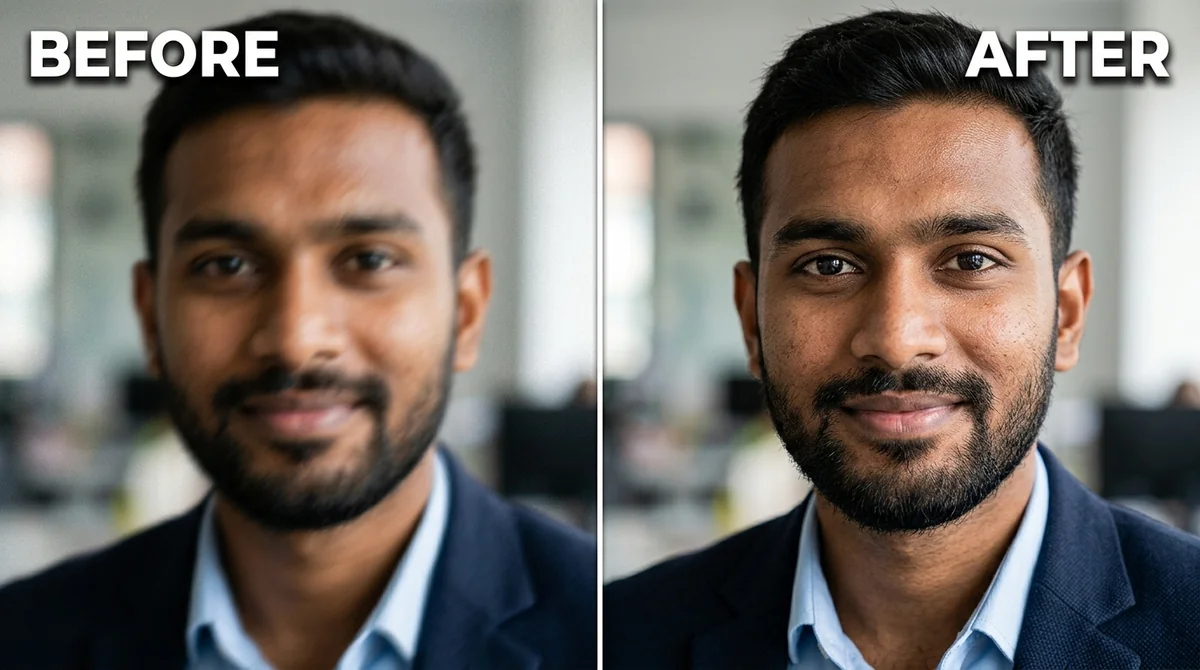
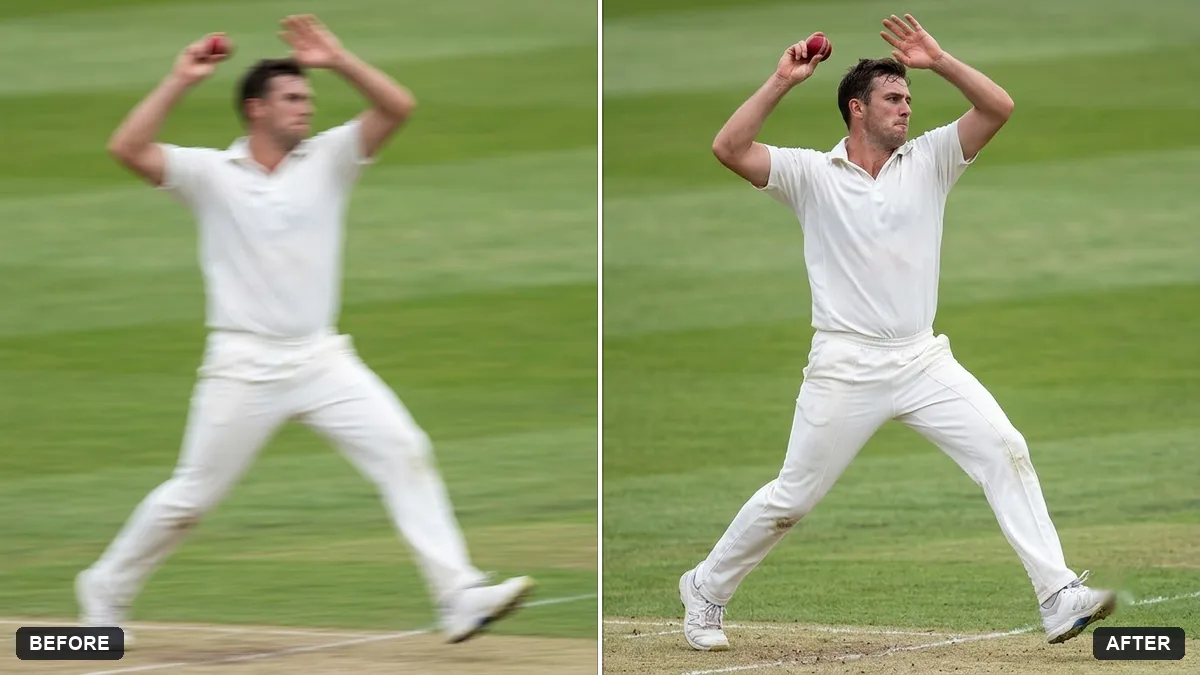
Blur from a moving subject or a shaky hand needs sharpening, not brightening. The fix a blurry photo prompt is built around keeping identity untouched while the blur goes:
Enhance this photo to be sharp and clear. Remove the motion blur and focus softness, and restore crisp, natural detail in [AREAS, e.g. the eyes, hair, skin, fabric] without halos or over-sharpening.

Keep every person's face, identity, expression, pose and background exactly as they are.
Two things make the difference here. First, naming the areas that need detail (eyes, hair, fabric) gives the AI a target instead of sharpening the whole image evenly, which can make noise worse. Second, the "keep everything unchanged" line stops it from smoothing skin while it's in there, which is the most common side effect of a blur fix.
For a moving subject specifically, such as sharpening a blurry sports shot or a pet mid-jump, ask it to keep a little motion blur in the background. A fully sharp background on a fast-moving subject looks fake; a photographer's lens keeps some blur there on purpose.
Rescuing a dark or noisy photo
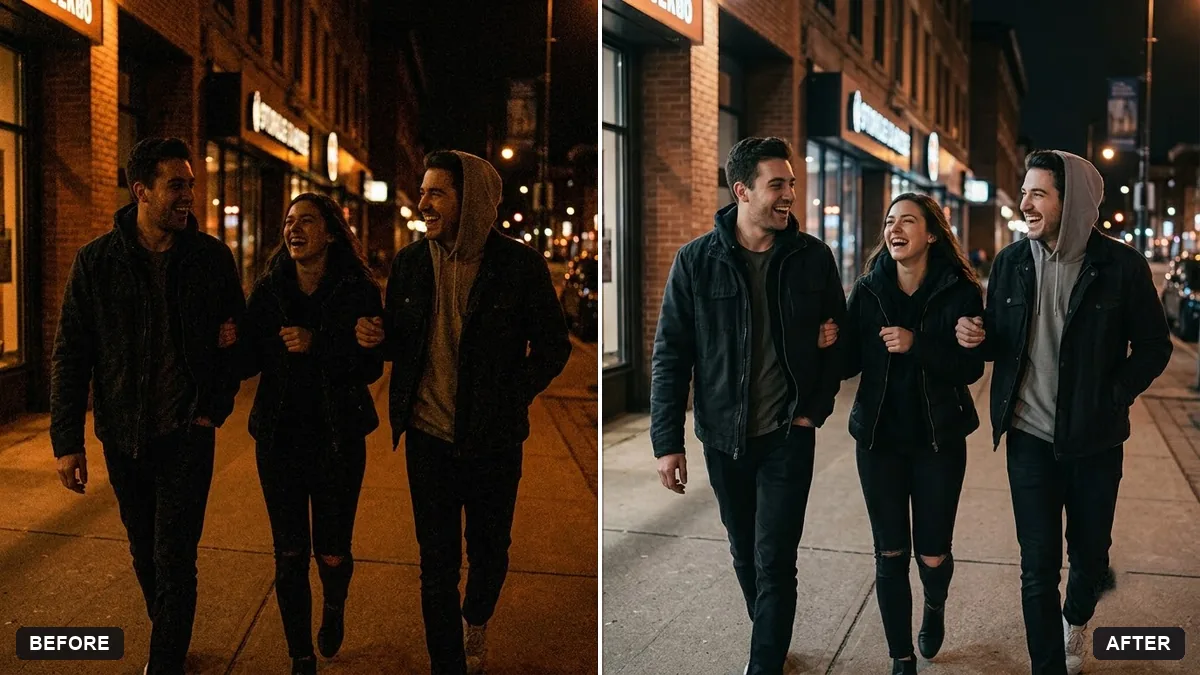
Low light brings three problems at once: the photo is dark, it's grainy, and the colours often shift orange or green under indoor or street lighting. The rescue a dark, noisy night photo prompt handles all three in one request:
Rescue this dark, noisy [SCENE, e.g. night street, indoor party] photo. Brighten it evenly, recover detail in the shadows without flattening the image, reduce grain, and correct the orange or green colour cast.

Keep the mood of the night, and keep every person's face and everything else unchanged. Natural result, not HDR-looking.
The "not HDR-looking" line matters more than it seems. Left unguided, AI brightening tends to flatten contrast and oversaturate colour, which gives photos that overcooked HDR look. Asking for a natural result, and naming the time of day, keeps the mood of the original instead of turning a moody night photo into something that looks like midday.
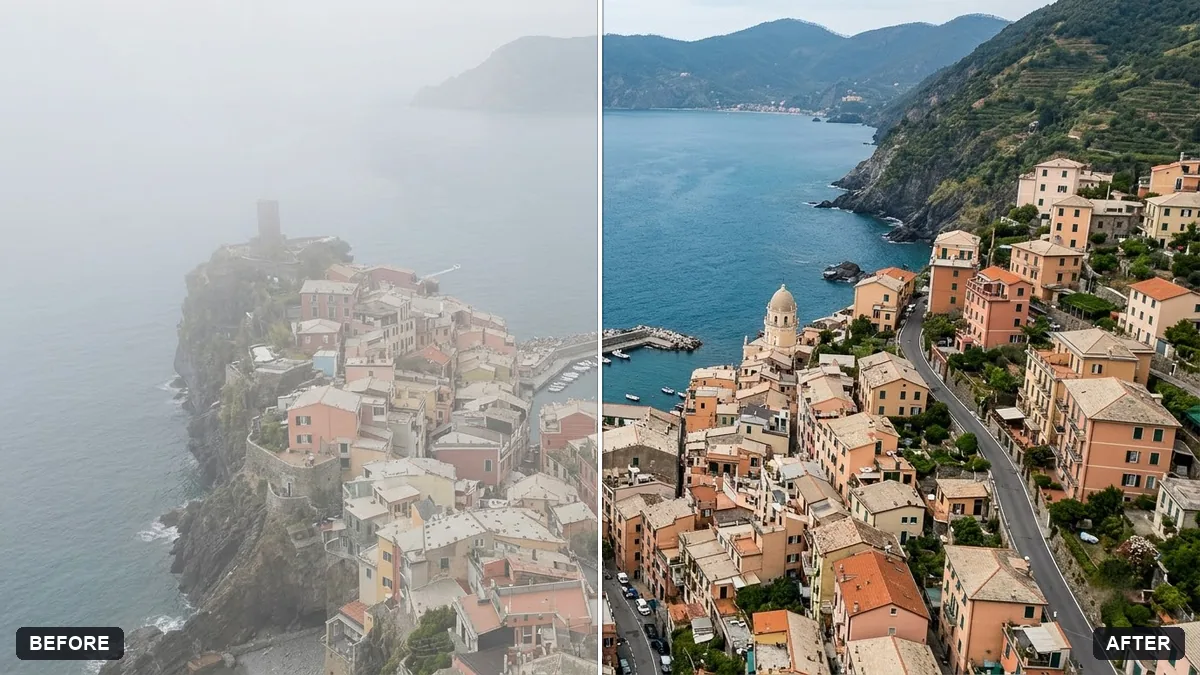
If the photo has a specific subject that needs to stay sharp against a hazy or dim background, such as a drone photo in haze, say so directly: "sharpen the buildings and coastline, balance the sky, keep the scene realistic."
Upscaling a small photo
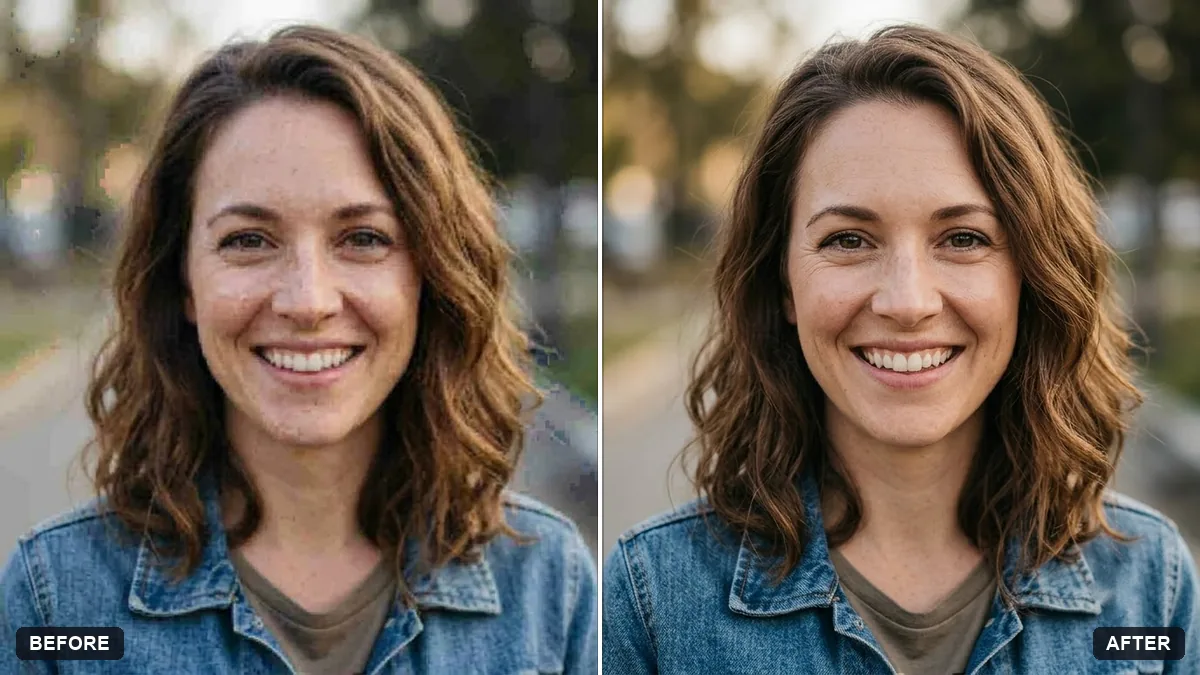
A photo that's too small to print or post gets soft and blocky when you resize it. Asking an AI to "make this bigger" can go two ways: it adds real detail back, or it invents a face that's close but not quite right. The sharpen and upscale a small photo prompt is written to avoid the second outcome:
Upscale this small photo to a higher resolution. Enhance detail in [FACES / TEXTURES / TEXT], and reduce compression blocks and noise.

Keep every person, object and colour exactly the same. Do not invent new details or change faces. Natural sharpness, no over-smoothing or plastic skin.
"Do not invent new details" is the key line for anything with a recognisable face in it, such as an old portrait you're upscaling for printing. It's a reasonable limit for the AI to work within: recover what's plausibly there, rather than guess at a sharper version of someone's features.
A few things to watch for
- The face changed slightly after a blur or upscale fix. Reply: "Keep the face identical to the original, only fix the sharpness."
- Skin looks smoothed or plastic. Add "natural skin texture with visible pores, no smoothing."
- Colours look washed out after brightening a dark photo. Ask for "natural colour saturation, not flat or grey."
- The background lost all its blur after sharpening. Ask it to "keep natural background blur, only sharpen the main subject."
Where to go from here
Blurry and dark photos are a different problem from old, torn or faded ones. If you're working on a genuinely old family photo instead, the AI photo restoration guide covers scratches, colour fading and tears. The prompts in this guide live in the AI photo enhancer prompts collection, with more for drone shots, concert photos and pet action shots, and the prompt builder can write one for your exact problem.
Quick checklist
- Name the actual problem: motion blur, low light, or low resolution, not just "enhance".
- Say which areas need detail: eyes, hair, fabric, text.
- Always add "keep every face and object exactly the same."
- Ask for a natural result, not an HDR or overly smoothed look.
- For moving subjects, ask to keep a little background blur on purpose.
Prompts to try
More prompts on this topic
- Rescue an underexposed concert photoGemini · ChatGPT
- Fix wide-angle lens distortionGemini · ChatGPT
- Recover blown-out highlightsGemini · ChatGPT
- Brighten a face in a backlit photoGemini · ChatGPT
- Sharpen a blurry pet action shotGemini · ChatGPT
- Fix an overexposed baby photoGemini · ChatGPT
Comments
No comments yet. Be the first to share what worked for you.