AI tattoo design prompts: from idea to a placement you can preview
Published
Short answerDescribe the style, subject, placement and size separately, ask for a plain stencil-style design, then preview it on a photo of your own skin before you commit. Doing the three steps separately gives a far cleaner result than one long prompt.
A tattoo is permanent, so it's worth getting the idea right before you sit in a chair. AI is useful here in a narrow, specific way: it can sketch styles fast, turn a rough idea into a clean line drawing, and show you roughly how a design will sit on your own arm, shoulder or wherever you're planning it. It is not a substitute for a tattoo artist, who will adjust the design for your skin, size and the way lines age. Think of these prompts as the moodboard stage, not the final art.
1. Design the idea
Start with style, subject, placement and size as separate pieces of information. Vague prompts like "a cool tattoo" produce generic results; specific ones don't.
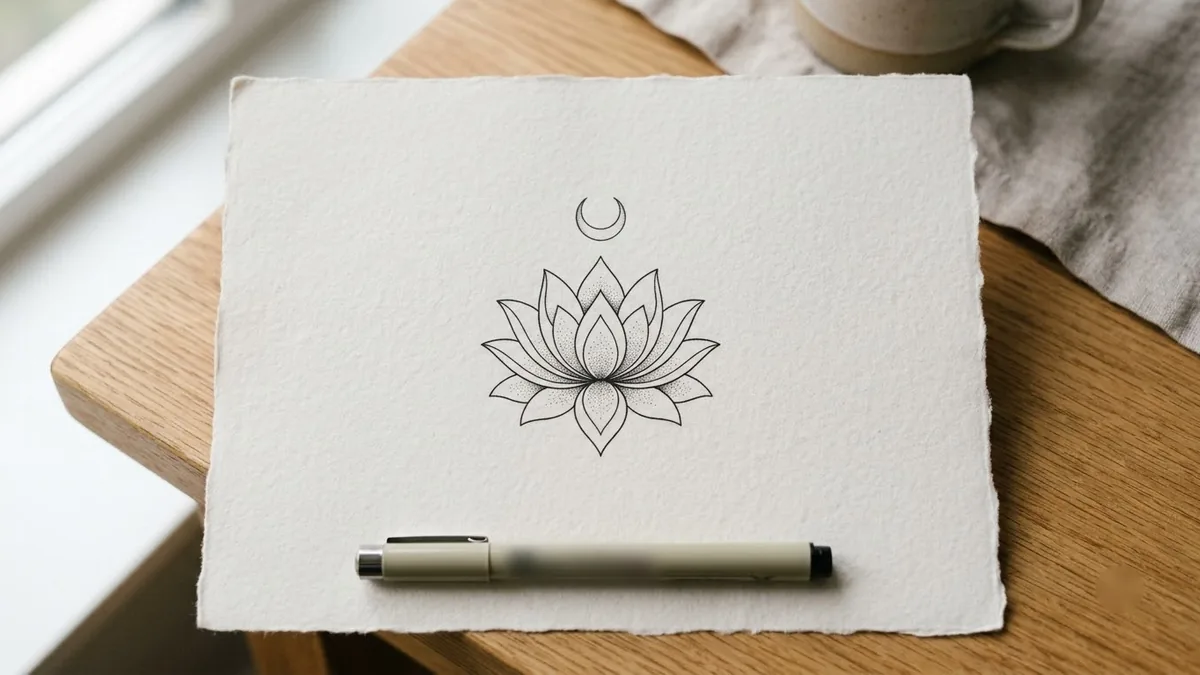
Design a [STYLE, e.g. fine-line minimalist] tattoo of [SUBJECT, e.g. a lotus with a small crescent moon].

Placement: [PLACEMENT, e.g. inner forearm], about [SIZE, e.g. 10 cm] tall. Clean black linework and a balanced composition, with no shading unless the style needs it.

Show the design centred on plain white paper, as a clear stencil a tattoo artist could use.
This is the tattoo design idea prompt. A few style words worth trying: fine-line, blackwork, traditional (bold outlines, solid colour), botanical, geometric, script. Each pulls the result in a different direction, so pick one at a time rather than listing several.
2. Keep it simple on purpose
Tattoos lose detail over the years, especially small or thin lines. If an AI design looks intricate and delicate, that's a style choice to question, not just admire. Ask for fewer, thicker lines if you want something that will still look sharp in ten years:
Simplify this design: fewer lines, thicker strokes, less fine detail, while keeping the same subject and composition. This needs to still read clearly as a tattoo after it ages.
3. Preview it on your own skin
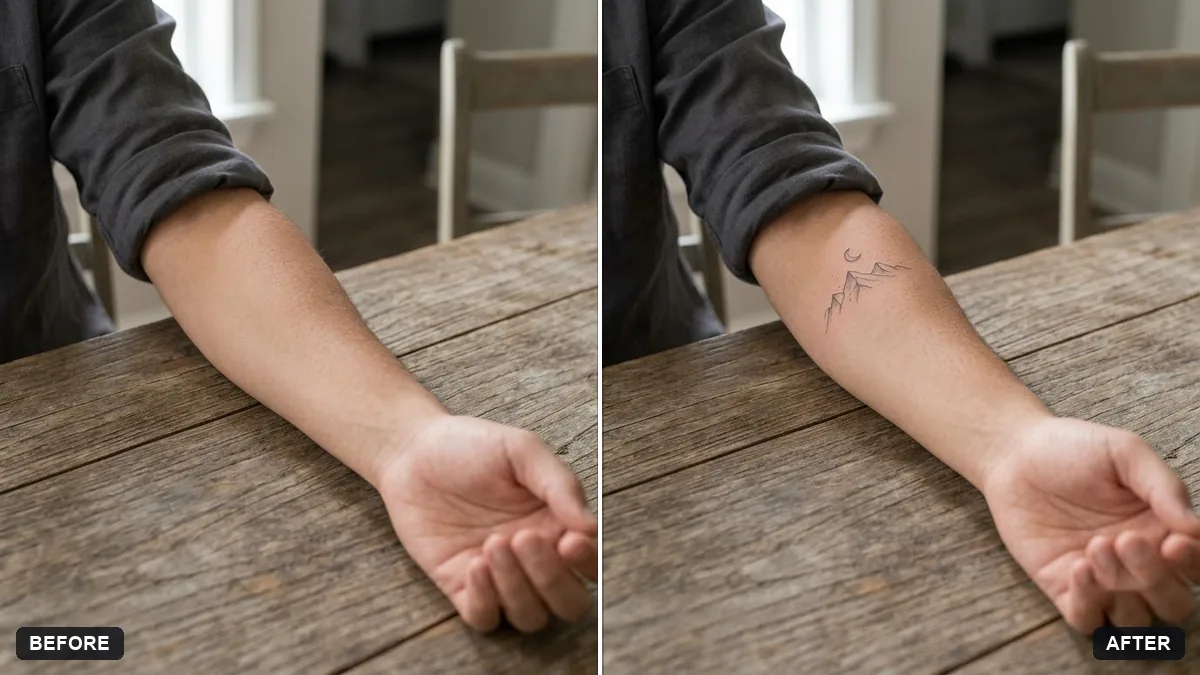
This is the step that actually helps you decide. Take a clear, well-lit photo of the body part you're planning to tattoo, and the design from step 1, then use the placement preview prompt:
Place the tattoo design from the second image on the [FOREARM / SHOULDER / CALF] in the first photo, sized about [SIZE]. Follow the curve of the skin, match the lighting and let the skin texture show through the ink.

Do not change anything else. Realistic healed-tattoo appearance.
Try a couple of sizes and a couple of placements before you decide. Seeing a design at 6cm versus 12cm on your own arm, in your own lighting, tells you far more than looking at it on plain paper.
4. Turn any reference into a clean stencil
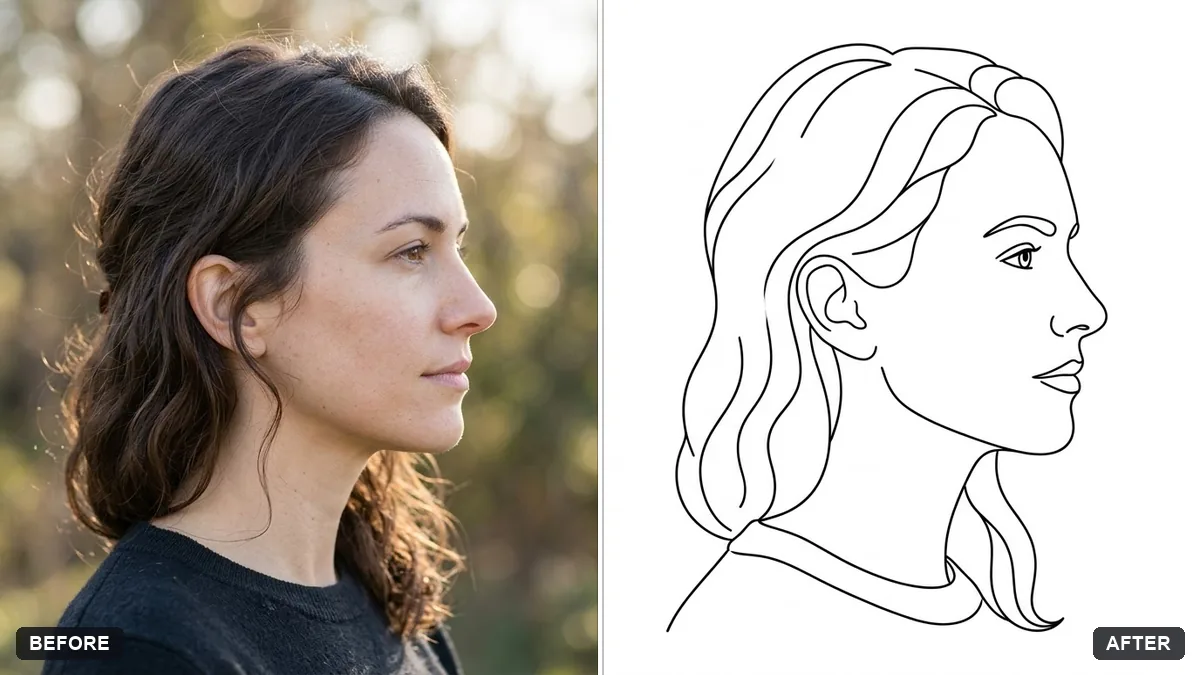
If you already have a sketch, a photo of someone else's tattoo you like, or even a drawing you made by hand, you can clean it up into stencil-ready linework with the line drawing conversion prompt:
Convert this photo into a clean single-weight black line drawing on a white background, keeping the main outlines and facial features recognisable and removing fine textures and shading.

Minimal, elegant, suitable for printing or tattoos. Extra instructions: [ANY DETAIL TO KEEP OR AVOID].
This is also a good way to turn a pet's face, a portrait or a logo into something closer to what a tattoo artist can actually work from.
5. A fun one for the reveal
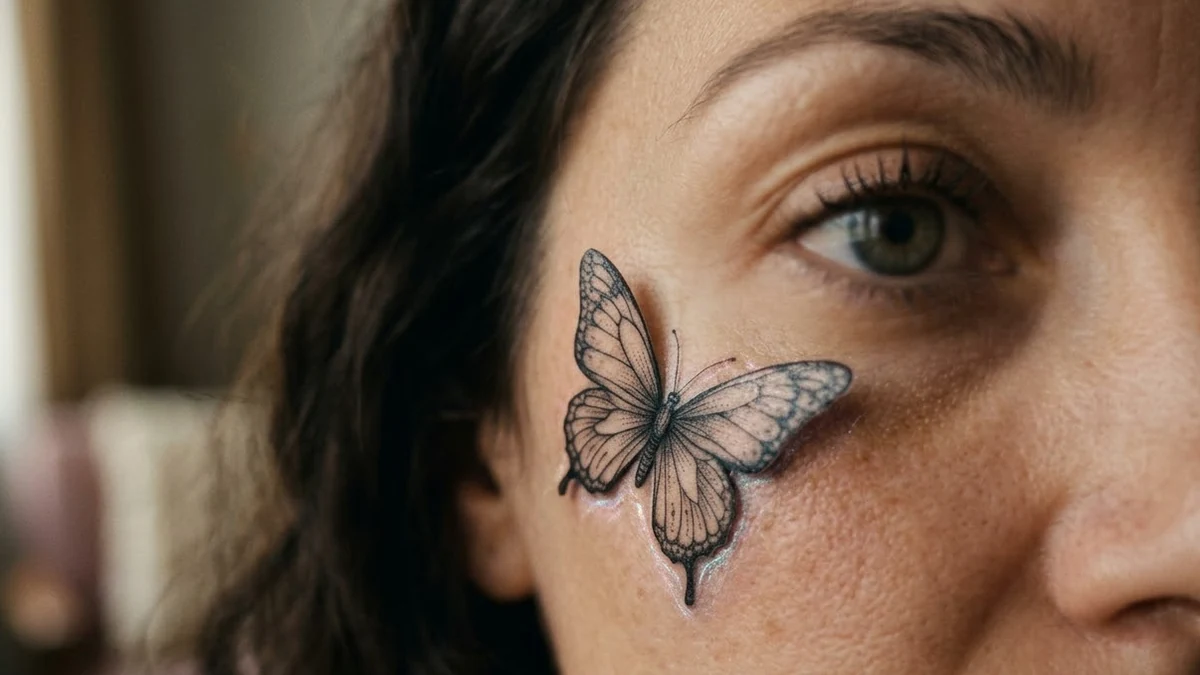
If you want a short clip to post once the tattoo is real, or just to tease the idea, the tattoo animation prompt does a small design "landing" on skin in a close-up portrait clip. Use a real photo with clear, visible skin, and keep the design small and simple so the effect looks convincing rather than cartoonish.
Common problems
The text or symbol is garbled. AI tools are still unreliable with lettering. Keep any script short, and check the spelling carefully, or ask a tattoo artist to hand-letter that part.
It changed your face or body in the preview. Add "keep my face, skin tone and body exactly the same" at the start of the prompt, and repeat it if the first try drifts.
The design looks painted, not inked. Ask again for "flat black ink, no gradient shading, no painterly brush texture" to pull it back toward something a tattoo gun could actually produce.
It's too detailed for the size you want. Go back to step 2 and simplify before you fall in love with a design that won't hold up small.
Where to go from here
Once you're happy with a design, bring it to a licensed tattoo artist. They'll adjust the linework for your skin and placement in ways AI can't predict. For more on getting a cleaner result from any image prompt, see why your prompt isn't working. All the prompts above are free in the image generation prompts collection, and the prompt builder can write a custom version for your own idea.
Quick checklist
- Describe style, subject, placement and size as separate details.
- Ask for simple, thick linework if the design will be small or will age.
- Preview the design on a real photo of your own skin before deciding on size.
- Turn any reference image into clean stencil lines before showing an artist.
- Keep faces and skin tone unchanged, and say so in the prompt.
- Take the final design to a real tattoo artist before booking.
Comments
No comments yet. Be the first to share what worked for you.