How to check which folders Windows Security is told to skip
Published
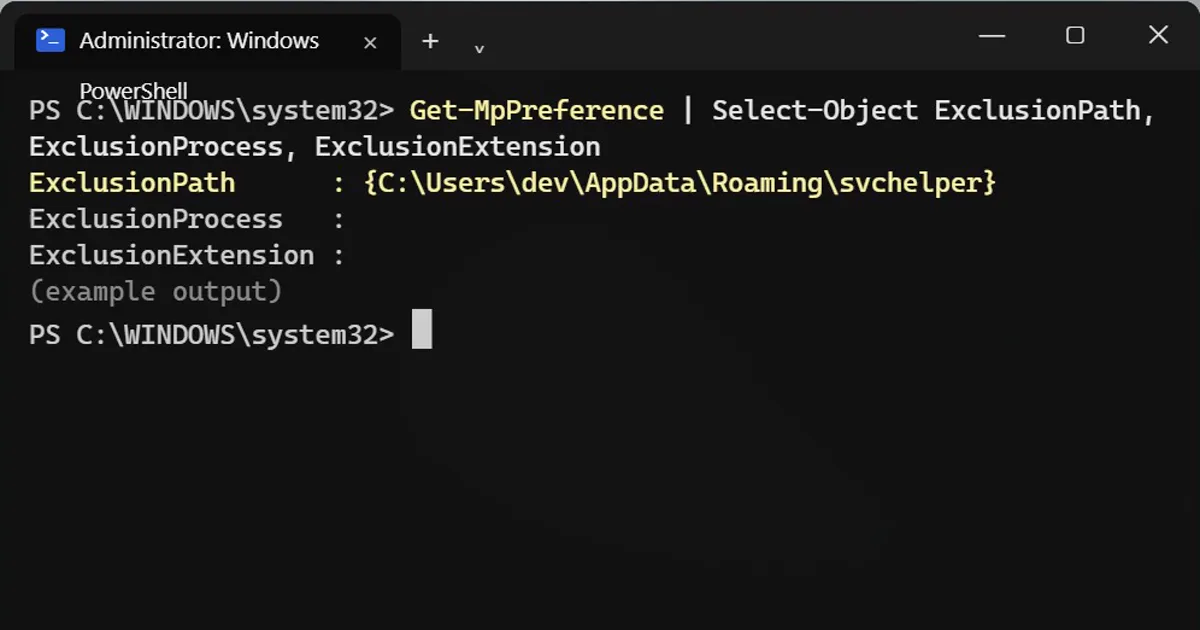
Short answerRun Get-MpPreference | Select-Object ExclusionPath, ExclusionProcess, ExclusionExtension in PowerShell as administrator to see every folder, program and file type Windows Security skips. Empty is the best result. A folder you never added deserves a closer look.
Windows Security (Microsoft Defender) scans your files, but you can tell it to skip certain folders, programs or file types. That list is called the exclusions. It is useful for developers and gamers, and it is also a place where unwanted software sometimes adds itself so it never gets scanned. Checking it takes about a minute.
Step 1: Look at your skip list
Open PowerShell as administrator: press the Windows key, type PowerShell, right-click it and choose Run as administrator. Then type:
Get-MpPreference | Select-Object ExclusionPath, ExclusionProcess, ExclusionExtension
Example output (yours will differ):
ExclusionPath      : {C:\Users\dev\AppData\Roaming\svchelper}
ExclusionProcess   :
ExclusionExtension :- Empty is the best result. Nothing is being skipped.
- Games, Docker and coding tools sometimes add their own folders. That is normal when you installed the tool and the folder name matches it.
- A folder you never added, especially one under
AppDataorTemp, deserves a closer look. Search the folder name before you decide.
"Must be an administrator"?
If you run the command in a normal window you will see N/A: Must be an administrator to view exclusions. That is not an error. Windows hides the list from normal users on purpose, so a program running without admin rights cannot read it either. Close the window and open PowerShell as administrator.
Step 2: See everything it has caught
Get-MpThreatDetection | Select-Object InitialDetectionTime, ProcessName, Resources
This lists each detection with the time, the program involved and the exact file. An empty result means Windows Security has not recorded any detection on this PC.
Step 3: Check protection is really on
Get-MpComputerStatus | Select-Object RealTimeProtectionEnabled, IsTamperProtected
RealTimeProtectionEnabled should be True. IsTamperProtected set to True means other programs cannot quietly switch your protection off.
Step 4: Remove a skip you did not add
If you are sure a folder should not be there, remove it as administrator:
Remove-MpPreference -ExclusionPath 'C:\path\you\found'
This command changes a setting, so be sure first. Then run a full scan from Windows Security: Virus & threat protection, Scan options, Full scan.
Before you remove anything
Removing a skip that a game or coding tool relies on can make it slower, or get its files flagged. If you are not sure, search the folder name, and ask the tool's support page what it needs. If you use a different antivirus, these commands only show the settings of Windows Security, not the other product.
More quick tips
More prompts on this topic
- Build a small command-line toolClaude · ChatGPT · Gemini
Comments
No comments yet. Be the first to share what worked for you.